Print by number:: How to use my 9/10 patch tool
怎樣使用 9/10 格工具
1. 先下載導具:
![]()
9格指的是:CMYK100、CMYK50+灰(C50MY40) 9 格,再加紙張總共10格。
2.依量測軟體(ColorPort or i1Profiler)下載導具敘述(TDF, Target definition format)
Colorport TDF: CT9.xml
I1Profiler TDF: CT9.rwxf
3.量測軟體導入TDF
Colorport: [目標]->[目標管理器]->[匯入]->CT9.xml


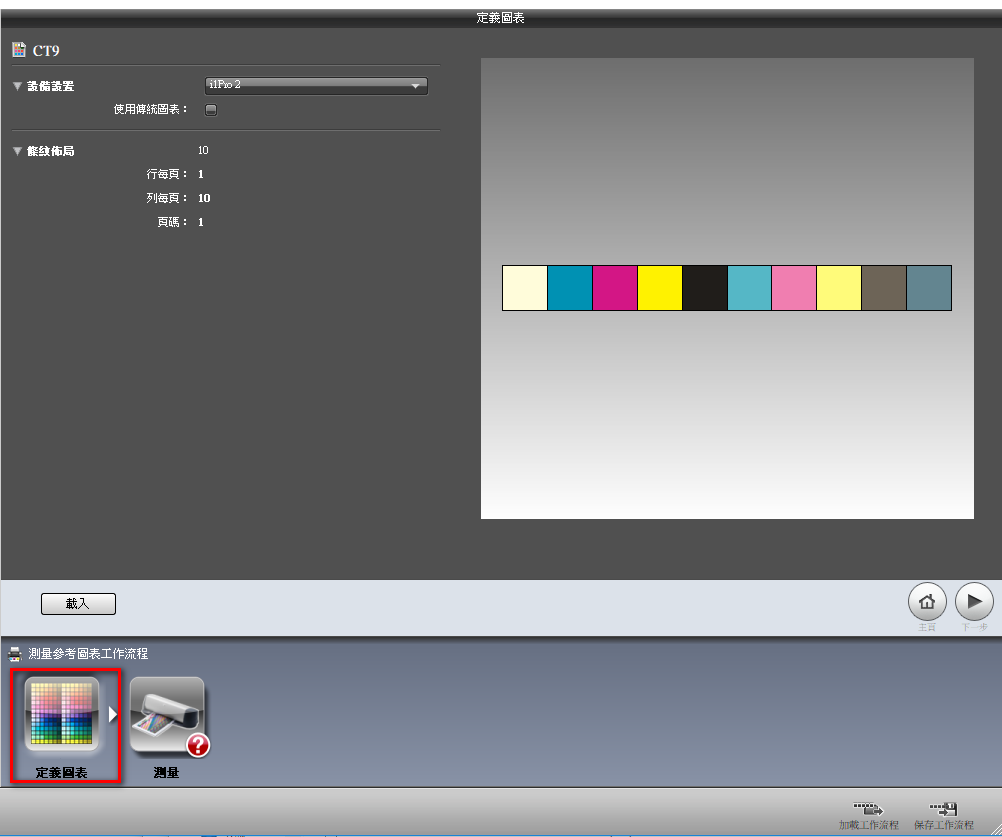
i1Profiler: [測量參考圖表]->

CT9.rwxf 可直接拖入i1profiler 的 “定義圖表” 或放在”C:\ProgramData\X-Rite\i1Profiler\ColorSpaceCMYK\MeasureReferenceWorkflows”
4. 量測及儲存光譜資料:
ColorPort: [儲存資料]->[CGATS]->[光譜範圍: 380nm-730nm]->[色值: 0-0.1]->[儲存]


i1Profiler: [保存]->[i1profilerCGATS光譜]->[存檔]


5. 將存好的光譜資料往這個地方丟:

丟上去後可看到分析資料:

如何看資料?
分3個部分::
1. Beer’s Law 滿版濃度落點預測,


以C版為例,實際量測濃度1.28 色差3.73, 預測濃度加到1.38時 色差可降到2.65。
2. Fogra TV 觀點:


第一排為TVI值,數值顯示為與標準的差距(CMY50 TV 在64+-4, K50 TV 為67+-4) ,以K50例,TV比標準多了4.12,剛好超過Fogra 規範。 第二排為濃度值,只取K用來比對G7 對 K50濃度定義(標準為0.5)。
3. G7 TV 觀點:


目前灰度(df)差為1.59,亮度差(GL)為-0.2,已符合G7規範(df<3,dL<3),若要收斂灰度差及亮度差,依圖指示,減1格C及加1格M可收斂低灰度差及亮度差。另K50處濃度為0.58,比標準多了0.08(K50標準濃度為0.5),K版必須降0.08濃度以符合G7規範。
TV 觀點處(Fogra 與 G7),取其一即可,看你遵循的標準是Fogra PSO 或是 G7;我會建議G7觀點,比較接近視覺。
這是一個簡捷及快速進入印刷標準化的工具,若能例行性落實此9格工具,比認證書更具實效。

真有師父喜歡用,自己做了9格的i1導尺。

Tags: Fogra PSO, idealliance g7, 印刷標準化
1 則迴響
 Comments RSS
 TrackBack Identifier URI
 Leave a comment

[…] 數據準備方法参考之前貼文。http://www.fredkuo.idv.tw/wordpress/?p=3011 […]
通告 by Print by Number :: TV tool « Fred Kuo :: Blog on 六月 19, 2019 1:00 上午